

As you hang artwork, start by identifying the room's focal point and use strategically placed pieces to create a visual hierarchy. Choose artwork that tells a story or evokes emotions, and group three to five pieces with a common thread. Hang them at 57 inches from the floor, balancing scale and proportion. Consider frame styles, and don't be afraid to experiment with layouts until you find a look that sparks conversation. By following these secrets, you'll be well on your way to creating a harmonious space that draws the eye – and now, discover how to take your artwork arrangement to the next level.
Understanding the Room's Focal Point
As you step into a well-designed room, your eyes are naturally drawn to a specific area, and that's because of the focal point. This anchor in the space directs your attention, creating a visual hierarchy. To effectively hang artwork, you need to identify the room's focal point. Look for architectural features like fireplaces, stunning views, or built-in shelving. Focal point identification is essential, as it sets the stage for your artwork. Once you've pinpointed the focal point, you can improve it with strategically placed art pieces. Focal point improvement creates a sense of harmony, balancing the visual weight of the room. By comprehending the room's focal point, you'll be able to create a cohesive look that draws the eye and stimulates conversation.
Selecting Artwork That Tells a Story
How do you want your artwork to make people feel? Do you want to evoke a sense of calm, spark curiosity, or ignite passion? Selecting artwork that tells a story can create an emotional connection with your audience, making your space feel more intimate and inviting.
To curate a collection that resonates, consider the following:
- Personal significance: Choose pieces that hold personal meaning, such as a family heirloom or a souvenir from a memorable trip.
- Storytelling art: Opt for artwork that conveys a narrative, like a painting that depicts a pivotal moment in history or a photograph that captures a poignant expression.
- Emotional resonance: Select pieces that evoke feelings or emotions, such as a serene scenery or an abstract expressionist piece that conveys energy and movement.
- Contextual relevance: Consider the artwork's connection to the room's theme, style, or era, ensuring a cohesive and thoughtful curation.
Considering the 57-Inch Rule
Now that you've curated a thoughtful collection of artwork, it's time to contemplate the ideal viewing height. The 57-inch rule is a tried-and-true guideline for achieving perfect visual alignment. This rule states that the center of the artwork should be positioned 57 inches from the floor, which corresponds to the average human eye level. By hanging your artwork at this height, you'll create a sense of balance and harmony in the room. This rule applies to individual pieces in addition to groupings, so don't be afraid to experiment with different arrangements. When hanging multiple pieces, consider the collective visual weight and adjust the hanging height accordingly. By adhering to the 57-inch rule, you'll be able to create a visually stunning display that draws the eye and sparks conversation.
Creating a Visual Flow
By grouping similar pieces together, you can create a visual flow that guides the viewer's eye through the room, nurturing a sense of cohesion and visual interest. This thoughtful art placement strategy allows you to control the visual narrative, drawing attention to specific areas or creating a sense of calm.
To create a visual flow, consider the following:
- Unify through color coordination: Select pieces with similar hues or contrasting colors to create visual harmony.
- Play with textures: Mix smooth and rough textures to add depth to your arrangement.
- Vary frame styles: Combine ornate and simple frames to create visual interest.
- Create a focal point: Designate a statement piece to draw the eye and anchor the arrangement.
Balancing Scale and Proportion
As you master the art of creating a visual flow, you'll want to turn your attention to balancing scale and proportion, ensuring that each piece complements the room's architecture and the other artworks. This delicate balance is essential in creating a harmonious atmosphere.
| Scale Relationships | Proportion Principles |
|---|---|
| A large piece above a sofa can create a sense of grandeur | The artwork should be 2/3 to 3/4 the length of the furniture |
| A small piece in a large room can get lost | Balance large pieces with smaller ones to avoid visual overload |
| Mixing large and small frames adds visual interest | Varying frame widths and styles can create a cohesive look |
| A massive piece in a small room can overwhelm | Leave some negative space to avoid clutter and chaos |
Working With Different Frame Styles
In the process of selecting a frame style that improves the artwork is essential, it's equally important to take into account how different frame styles interact with each other and the room's decor. You can create a visually appealing space by mixing and matching frame styles, materials, and colors. To achieve this, consider the following:
- Frame materials: Combine wood, metal, and acrylic frames to add depth and texture contrast.
- Color coordination: Select frames that complement the artwork's dominant colors and the room's color scheme.
- Eclectic combinations: Pair vintage frames with modern aesthetics to create a unique, gallery-like feel.
- Frame layering: Use a combination of thick and thin frames to add visual interest to your walls.
Grouping Pieces for Maximum Impact
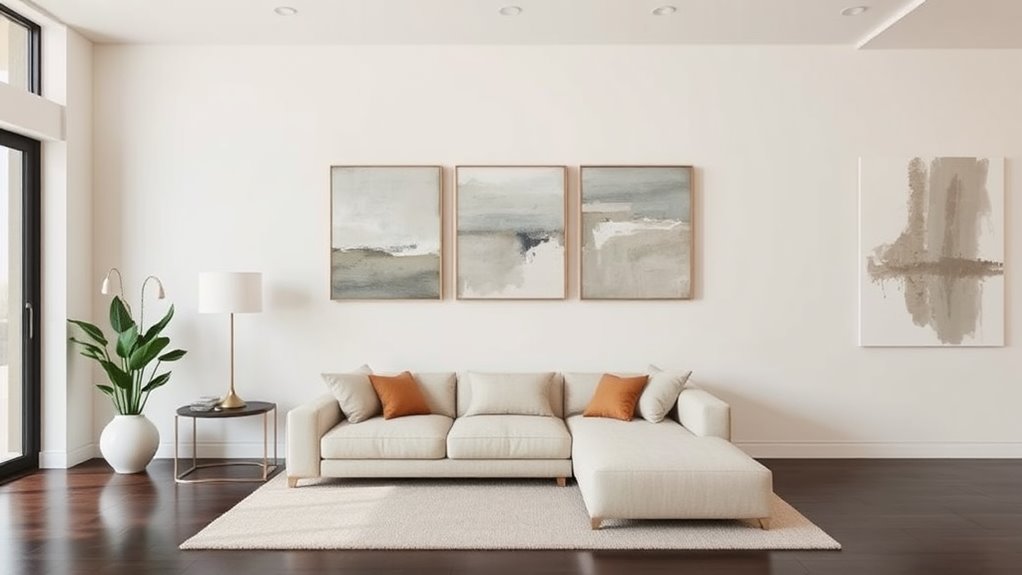
Three to five pieces of artwork strategically grouped together can improve a room's aesthetic and create a focal point. You can create an art arrangement that tells a story, evokes emotion, or adds visual interest. To do this, start by selecting pieces that share a common thread, such as similar colors, shapes, or themes. Consider the 60-30-10 rule: 60% of the arrangement should be a dominant piece, 30% a secondary piece, and 10% an accent piece. Use color coordination to tie the pieces together, choosing frames or mats that complement the artwork's hues. Don't be afraid to experiment with different layouts until you find one that feels balanced and visually appealing. Remember, the goal is to create a cohesive look that draws the eye and sparks conversation. By grouping your artwork thoughtfully, you can uplift your space and make a lasting impression.
Using Artwork to Define Spaces
As you arrange your artwork, you can use it to define different zones within a room, creating separate areas for relaxation, work, or entertainment. By placing pieces strategically, you establish visual boundaries that guide the eye and create a sense of flow. By anchoring a focal point with a statement piece, you can likewise draw attention to a specific area and create a sense of visual hierarchy.
Zone Creation With Art
By grouping similar activities together, you can create distinct zones within an open-plan space, and artwork plays a crucial role in defining these areas. By thoughtfully selecting pieces that resonate with the zone's purpose, you can create a cohesive art zone that improves the ambiance and functionality of the space.
To create an effective art zone, consider the following:
- Unify the color palette: Choose artwork that complements the zone's dominant colors to create visual harmony.
- Scale matters: Select pieces that are proportional to the zone's dimensions to avoid overwhelming or underwhelming the space.
- Define the focal point: Place a statement piece in a prominent location to draw attention to the zone.
- Balance and contrast: Mix different styles, textures, and frames to add depth and visual interest to the zone.
Visual Boundaries Defined
Now that you've successfully created zones within your open-plan space, it's time to explore how artwork can help define the boundaries between them. By strategically placing pieces, you can create visual boundaries that improve spatial awareness and promote a sense of separation between areas. This is especially important in open-plan spaces, where the lack of physical walls can make it difficult to distinguish between zones. To achieve visual balance, consider the size, color, and style of the artwork in relation to the surrounding space. For example, a large piece above a sofa can help define a seating area, whereas a series of smaller pieces can create a sense of continuity between zones.
Focal Point Anchor
A statement piece of art can serve as a focal point anchor, drawing your attention to a specific area within the open-plan space and distinguishing it from surrounding zones. This technique is crucial in creating a focal point definition, as it helps to break up the space and create visual interest. The focal point importance lies in its ability to guide your eye through the room, creating a sense of flow and harmony.
Here are four ways to use artwork as a focal point anchor:
- Create a vignette: Group a few statement pieces together to create a visually appealing focal point.
- Play with scale: Use large or oversized artwork to draw attention to a specific area.
- Add texture: Mix media, such as combining paintings with sculptures, to add depth and interest.
- Experiment with color: Use bold or contrasting colors to create a striking focal point.
Editing and Refining Your Layout
You've arranged your artwork, but now it's time to refine your layout. To create a visually appealing space, you'll need to strike a balance and harmony among the pieces, ensuring that each one complements the others. By controlling the visual flow, you'll guide the viewer's eye through the room, creating a sense of cohesion and style.
Balance and Harmony
As you step back to survey your artwork layout, consider whether the visual weight of each piece creates a sense of balance and harmony. You want your arrangement to feel cohesive, not chaotic. Achieve this by paying attention to art symmetry and color harmony.
To refine your layout, ask yourself:
- Are the largest and darkest pieces balanced by lighter, smaller ones?
- Do the frames and mats create a sense of visual continuity?
- Are the colors of the artwork complemented by the surrounding decor?
- Does the arrangement feel symmetrical, or is it intentionally asymmetrical to create visual interest?
Visual Flow Control
Now that you've achieved balance and harmony, it's time to direct the viewer's eye through your artwork arrangement. This is where visual flow control comes in – creating an artistic rhythm that guides the viewer's attention. To do this, consider the size, color, and placement of each piece. You want to create a sense of movement that leads the viewer through the arrangement.
| Visual Flow Element | Technique | Effect |
|---|---|---|
| Focal Point | Place a large or bold piece in a prominent location | Draws the viewer's attention |
| Visual Path | Create a diagonal or curved line with artwork | Leads the viewer's eye through the arrangement |
| Resting Points | Use smaller or calmer pieces to create visual breaks | Allows the viewer to pause and appreciate individual pieces |
Frequently Asked Questions
How Do I Hang Artwork on a Stairwell With Angled Walls?
Envision traversing a winding mountain road, where each twist reveals a new breathtaking view. Similarly, maneuvering a stairwell with angled walls can be a thrilling adventure – if you know where to place your artwork. To conquer this challenge, you'll want to create a visual flow that guides the viewer's eye upward. Start by grouping smaller pieces on the lower levels, gradually increasing in size as you ascend, and cleverly using the angled walls to create a sense of movement.
Can I Mix Frame Styles and Still Look Cohesive?
You're wondering if you can mix frame styles and still achieve a cohesive look. Absolutely, you can! Embracing frame harmony doesn't mean sticking to one style. Create an eclectic gallery by combining frames that share a common thread, like a similar color palette or era. This approach will add visual interest and personality to your space. Just remember to balance contrasting frames with unifying elements, like matting or a consistent hanging pattern, to tie everything together.
How Do I Secure Heavy Artwork From Falling?
When hanging heavy artwork, you'll want to take extra precautions to prevent it from crashing to the floor. First, grab a wall stud finder to locate the sturdy wooden beams behind your drywall. Then, use heavy-duty anchors designed for the weight of your piece. Drill them into the wall stud for maximum support. Finally, hang your artwork, knowing it's securely fastened and won't come tumbling down. With these steps, you'll guarantee your valuable piece remains safely in place, impressing all who enter your space.
What Is the Ideal Height for Artwork Above a Sofa?
When hanging artwork above a sofa, you want to create visual balance and harmony. Aim to place the piece at a height that's roughly at your eye level when seated. This usually falls between 24 and 36 inches above the sofa's back. By doing so, you'll create a sense of calm and balance, making the space feel more inviting and thoughtfully designed. Trust us, it'll make all the difference!
Can I Hang Artwork in a Room With Low Ceilings?
You're wondering if you can hang artwork in a room with low ceilings? Absolutely, you can! Low ceiling solutions involve creating the illusion of height. You do this by emphasizing vertical lines, like a floor-to-ceiling piece or a series of tall, narrow frames. This visual trick will draw the eye upwards, making the ceiling feel higher than it is. Don't be afraid to experiment and find the perfect arrangement that makes your space feel airy and expansive.