


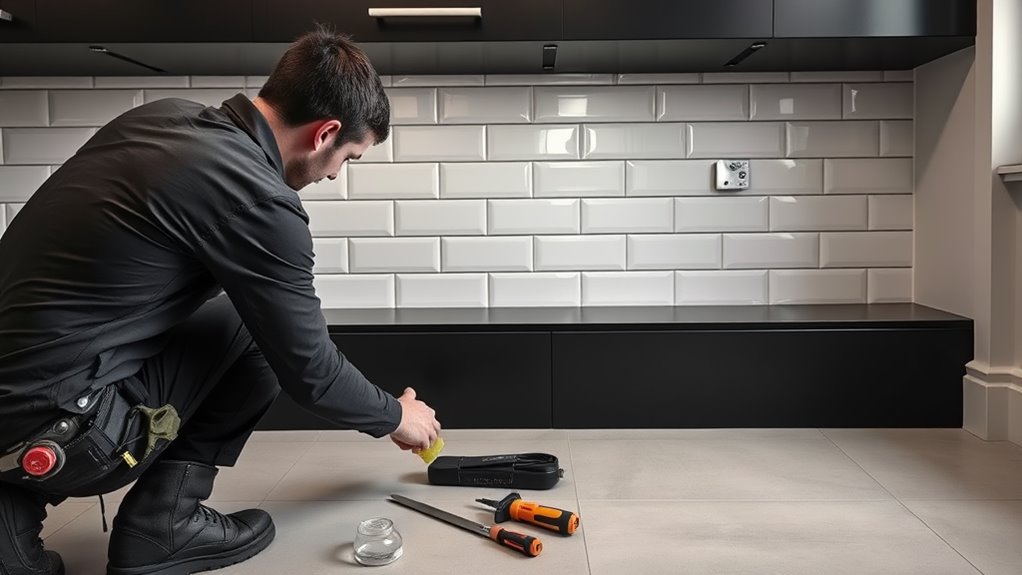
You're about to take your kitchen design to the next level by installing a backsplash like a pro! Start by clearing your workspace, choosing the right materials, and measuring the wall accurately. Apply the appropriate adhesive, lay out the tiles with precision, and grout them perfectly. As you work, maintain a clean and organized space to guarantee a seamless installation. With these fundamentals covered, you're well on your way to creating a stunning backsplash that will enhance your kitchen's style and functionality – and there's more to learn to achieve a truly professional finish.
Prepare the Workspace
Clear the area around your sink and stove of any clutter, appliances, or decorations to create a safe and unobstructed workspace. This is essential for maintaining workspace safety, as tripping hazards or falling objects can lead to accidents. Remove any items that could get in the way of your installation process, including dish racks, soap dispensers, and kitchen utensils.
Next, cover your countertops and floors with drop cloths or old sheets to protect them from dust, debris, and adhesives. This will make cleanup easier and prevent damage to your surfaces. Consider setting up a makeshift workstation, like a portable table or cart, to hold your tools and materials. This will keep everything within reach, allowing you to stay focused and efficient. By following these organization tips, you'll be well-prepared to tackle the backsplash installation process with confidence.
Choose the Right Materials
With your workspace prepared, it's time to focus on the fun part – selecting the perfect materials for your backsplash. You'll want to choose materials that not just fit your aesthetic choices but are likewise suitable for your functional needs. Consider the material types that will work best for your space, such as glass, tile, natural stone, or metal. Think about the style you're going for – modern, rustic, or traditional – and let that guide your decision. Will you opt for a bold, eye-catching material or something more subtle and understated? Consider factors like durability, maintenance, and budget as well. With so many options available, it's crucial to take your time and weigh the pros and cons of each material type before making a final decision. By choosing the right materials, you'll set yourself up for a successful and stress-free installation.
Measure and Mark the Wall
Now that you've selected your materials, it's time to get accurate measurements of the area where your backsplash will be installed. This step is essential to guarantee a seamless fit and avoid costly mistakes. Use a combination of measuring techniques, such as a laser level and a tape measure, to capture the dimensions of your wall.
| Area | Measurement | Notes |
|---|---|---|
| Wall width | 36 inches | Measure from one edge of the wall to the other |
| Wall height | 24 inches | Measure from the countertop to the top of the wall |
| Outlet locations | 2 outlets, 12 inches apart | Identify the location and spacing of outlets |
| Countertop overhang | 1 inch | Measure the overhang of the countertop from the wall |
Once you have your measurements, use marking methods like a pencil and a level to mark the wall with the dimensions of your backsplash. This will give you a visual guide to follow during installation.
Apply the Adhesive
You've got your measurements and markings in place, and it's time to prepare the wall for your backsplash installation. Now, it's crucial to apply the adhesive correctly to guarantee a strong bond between the tiles and the wall. Choose the right adhesive type for your tile material, whether it's a polymer-modified cement-based adhesive, epoxy-based, or acrylic-based. Read the manufacturer's instructions for the recommended application technique. Typically, you'll apply the adhesive to the wall using a notched trowel, holding it at a 45-degree angle. Spread the adhesive evenly, covering the entire area where the tile will be placed. Use a level to verify the adhesive is straight and level. Don't overapply the adhesive, as this can lead to a messy installation.
Lay Out the Tiles
One essential aspect of a successful backsplash installation is a well-planned tile layout. You've applied the adhesive, now it's time to bring your design to life. Start by dry-laying the tiles to visualize the pattern and make any necessary adjustments. Consider the tile patterns and design layouts you want to achieve, such as a herringbone or brick pattern. Use a level and a straightedge to verify the tiles are aligned properly. Begin by placing the center tile, then work your way outward in sections. Use spacers to maintain even grout lines and a rubber mallet to gently tap each tile into place. As you lay each tile, check the pattern and make adjustments as needed. This step requires patience and attention to detail, but the end result will be worth it.
Cut Tiles to Fit
Measure the spaces between the tiles you've laid out to determine which tiles need to be cut to fit around outlets, switches, or other obstacles. This step requires precision and patience to guarantee a seamless fit. To cut your tiles like a pro, you'll need the proper tools.
For tile cutting, you'll need:
- A tile cutter or wet saw to make straight cuts.
- A tile nippers to trim small pieces or curved cuts.
- A carbide scriber to score and break tiles for more intricate cuts.
Remember to always measure twice and cut once to avoid wastage. Use a straightedge or guide to guarantee accurate cuts. With the right tools and a bit of practice, you'll be able to cut tiles that fit perfectly around any obstacle.
Grout and Seal the Tiles
Two crucial steps remain to complete your backsplash installation: grouting and sealing. You've worked hard to get to this point, and these final tasks will make your backsplash shine. First, choose the right grout type for your tile material and desired look. Sanded grout is best for larger grout lines, whereas epoxy-based grout is ideal for high-traffic areas. Apply the grout, wiping away excess with a damp cloth. Let it dry, then seal it with a grout sealer to protect it from stains.
Next, apply a tile sealer to protect your tiles from spills and splatters. There are various sealing techniques to choose from, including topical sealers, impregnating sealers, and boosters. Topical sealers provide a barrier on the tile's surface, while impregnating sealers penetrate the tile to repel stains. Boosters not just protect but also highlight the tile's natural beauty. Whichever you choose, be sure to follow the manufacturer's instructions for a flawless finish.
Deal With Outlets and Switches
With your tiles now protected and sealed, it's time to turn your attention to the remaining details, starting with the outlets and switches. This step requires some finesse, but don't worry, you've got this!
- Remove the outlet covers: Take out the screws and gently pull the covers away from the wall. Set them aside for later.
- Adjust outlet placement: If needed, shift the outlets slightly to guarantee they're centered within the tile pattern. Use a level to verify they're straight.
- Install new switch covers: Replace the old covers with new ones that match your backsplash style. Make certain they fit snugly over the switches.
Remember to handle the outlets and switches with care, as they're delicate components. With these details taken care of, your backsplash is almost complete!
Add the Finishing Touches
You're almost done! Now it's time to add the finishing touches to your backsplash installation. This is where you get to focus on the finer details that will enhance your design from good to great. Start by installing tile trim around the edges of your backsplash to create a seamless shift between the tile and the surrounding surfaces. This will not merely add visual appeal but likewise help to conceal any gaps or imperfections.
Next, turn your attention to the finishing details. Check for any areas where the grout or caulk may be uneven or messy, and make any necessary adjustments. Make sure all the tiles are securely fastened and that there are no loose edges or corners. By paying close attention to these finishing details, you'll be able to achieve a professional-looking result that you'll be proud to show off.
Inspect and Maintain
As the final stage of your backsplash installation, inspecting and maintaining your new surface is vital to guarantee its longevity and appearance. You've invested time and effort into creating a stunning backsplash, and now it's important to make certain it remains in pristine condition. Routine inspections will help you identify potential issues before they become major problems.
To keep your backsplash looking its best, follow these maintenance tips:
- Clean up spills immediately: Wipe down the surface with a gentle cleaner to prevent stains and water spots.
- Check for grout damage: Inspect the grout lines for cracks or wear, and regrout as needed to maintain a watertight seal.
- Avoid harsh chemicals: Use mild cleaners and avoid abrasive materials that can scratch or damage the surface.
Frequently Asked Questions
Can I Install a Backsplash Over Existing Wallpaper or Paint?
You're wondering if you can install a backsplash over existing wallpaper or paint? The answer is yes, but it's essential to prep the wall first. Remove any loose or peeling paper or paint, and sand the surface to guarantee a smooth finish. Then, apply a strong adhesive to create a solid bond between the backsplash and the wall. With proper wall preparation and installation tips, you'll achieve a seamless look that'll make your kitchen shine!
How Do I Handle Uneven or Crooked Walls?
Ah, you thought you were a master of DIY, didn't you? But now, you're face to face with the harsh reality of uneven or crooked walls. Don't worry, it's not the end of the world! To tackle this mess, you'll need to get creative with your tile layout. Consider using a combination of straight and miter cuts to accommodate those pesky uneven surfaces. And, yes, it's okay to admit that some tiles might end up looking a little…crooked. Embrace the imperfection, and remember, it's all about the character it adds to your space!
Can I Use a Backsplash Behind a Gas Range or Stove?
When installing a backsplash behind a gas range or stove, you’ll need to prioritize safety precautions. You’ll want to choose heat-resistant materials, like ceramic, glass, or stainless steel, that can withstand the high temperatures. Don’t opt for porous materials like natural stone, which can absorb moisture and create a fire hazard. By selecting the right material and following safety guidelines, you’ll create a stunning and safe backsplash that complements your cooking space. Additionally, ensure that the backsplash is properly secured and installed at the correct distance from the burners to prevent any heat damage or safety risks. Regular maintenance and cleaning are essential to keep it in top condition, much like how the history of journalism reflects the importance of accuracy and diligence in reporting. By taking these precautions, you can enjoy both a functional and visually appealing backsplash that enhances your kitchen’s design.
Do I Need to Remove Outlet Covers Before Installing?
As you initiate this project, don't let electrical safety take a backseat. Before you start, you'll need to remove the outlet covers, a vital step often overlooked. It's like revealing a hidden secret: without it, you'll be stuck with a less-than-perfect installation. So, take a few minutes to pop off those covers, ensuring a seamless integration of your new backsplash with the electrical outlets. It's a small task that'll pay off in the long run, giving you peace of mind and a professional-looking finish.
Will a Backsplash Increase My Home's Resale Value?
When you're thinking about selling your home, you wonder if certain upgrades will pay off. You're smart to ask if a backsplash will increase resale value. According to resale trends, kitchen upgrades like a stylish backsplash can be a major selling point. It's a key feature that buyers look for in a modern kitchen. By installing a backsplash, you'll not just enjoy it during your time there, but you'll likewise attract potential buyers and increase your home's appeal.