


We can completely transform our outdoor areas from dull to beautiful havens with just a few simple, creative DIY projects. Start by upgrading your ambiance with DIY outdoor lighting ideas, such as solar lights or string lights. Build a cozy fire pit, or get creative with an upcycled planters project using old containers and eco-friendly paints. We can also enhance our outdoor space with a vertical garden, outdoor storage bench, or a statement-making DIY pergola installation. Whether we're looking for functional storage or a striking conversation piece, there are countless DIY projects to explore next.
DIY Outdoor Lighting Ideas
Transforming our outdoor spaces into inviting havens often starts with the right lighting. We're always on the lookout for innovative and eco-friendly solutions that can enhance our outdoor ambiance without breaking the bank. In terms of DIY outdoor lighting ideas, we've found that solar lights are a great option. These energy-efficient lights capture the power of the sun during the day and illuminate our spaces at night, reducing our carbon footprint and saving us money on electricity bills.
Another favorite of ours is string lights. These versatile lights can be hung from trees, pergolas, or gazebos, creating a warm and cozy atmosphere that's perfect for outdoor gatherings. We appreciate that string lights come in a variety of styles and colors, allowing us to personalize our lighting to complement our unique outdoor decor. Additionally, they're incredibly easy to install, making them a fantastic DIY project for homeowners of all skill levels.
To enhance our outdoor lighting further, we like to integrate solar lights and string lights in imaginative ways. For instance, we might utilize solar lights to line a pathway or highlight a specific feature in our yard, all the while using string lights to craft a canopy of light above our outdoor seating area. By experimenting with various lighting combinations, we can establish a genuinely distinctive and welcoming outdoor space that we're excited to share with friends and family.
Building a Fire Pit
When we build a fire pit, we want to create a cozy gathering spot that's both safe and enjoyable. To achieve this, we need to choose the right materials for our fire pit, considering factors like durability, heat resistance, and aesthetics. We'll need to carefully consider the placement of our fire pit to minimize risks and guarantee a fun experience for everyone.
Choosing the Right Materials
Transform Your Outdoor Space With These DIY Projects
Building a Fire Pit
Choosing the Right Materials
As we start constructing our fire pit, selecting the appropriate materials is crucial for both safety and durability. In terms of material selection, we need to take into account our project budget and the desired visual attractiveness of our outdoor space. We can pick from a variety of materials, each with its own distinct characteristics and advantages.
| Material Options | Key Characteristics |
|---|---|
| Brick | Resistant to weather, traditional appearance, costly |
| Stone | Sturdy, natural look, requires high upkeep |
| Concrete | Cost-effective, adaptable, susceptible to cracking |
| Metal | Contemporary appearance, easy to maintain, can be pricey |
| Gravel | Economical, requires little maintenance, can create a mess |
Ensuring Safe Placement
We've selected our materials, so now it's time to think about where our fire pit will go. This decision is vital for both safety and functionality. When choosing a location, we must consider the placement of our outdoor furniture and the flow of foot traffic in the area. A fire pit should be at least 10 feet away from flammable structures, overhanging branches, and any outdoor furniture that could catch fire.
We need to think about wind direction and weather patterns. A spot that provides some weather resistance, such as a covered patio or a clearing surrounded by trees, would be ideal. Moreover, we should consider the accessibility of our fire pit. We want to be able to easily move around it and add fuel without having to navigate through tight spaces.
Upcycled Planters Project
A few old containers can breathe new life into your outdoor space with the Upcycled Planters Project. We love this DIY project as it's easy on the wallet and great for the environment. Start by collecting old containers such as wooden crates, plastic tubs, or metal buckets. Give them a good clean and assess their condition. If they're a bit worn out, don't worry – this is where the magic happens.
Get creative with paint techniques to transform your containers into unique planters. You can use stencils, stickers, or even decoupage to add patterns and designs. For a more rustic look, try distressing the paint for a vintage vibe. If you're feeling adventurous, experiment with different colors and textures to create one-of-a-kind pieces. We recommend using eco-friendly paints to keep your project environmentally friendly.
Once you've painted and decorated your containers, it's time to add some greenery. Choose plants that fit your style and the amount of sunlight your outdoor space receives. From succulents to herbs, the possibilities are endless. Arrange your upcycled planters in a unique design that reflects your personality. You can create a vertical garden, a succulent wall, or a colorful display on a patio table. With a little imagination, you can turn old containers into stunning planters that enhance your outdoor space.
Outdoor Storage Bench
Constructing an outdoor storage bench is a practical and stylish way to maintain our outdoor areas organized and clutter-free. This DIY project not just offers a comfortable seating solution but additionally functions as a storage unit for outdoor necessities like gardening tools, cushions, and decorative items. By integrating outdoor organization into our seating design, we can maximize the functionality of our outdoor space.
When planning our outdoor storage bench, we should take into account the style and material that best complements our outdoor decor. We can utilize repurposed wood, metal, or upcycled plastic to craft a distinctive and environmentally friendly bench. Including a lift-top or hinged lid allows for effortless access to stored items, whereas a waterproof seal guarantees that our possessions remain dry and safeguarded.
To establish a seamless connection with our outdoor area, we can incorporate decorative elements such as cushions, planters, or a trellis. This not just boosts the visual appeal of our bench but also establishes a warm ambiance ideal for relaxation and socializing. By merging seating solutions with outdoor organization, we can develop a practical and welcoming outdoor space that mirrors our individual style. With a touch of imagination and ingenuity, we can convert our outdoor space into a stunning and efficient retreat that we can relish for years to come.
Creating a Vertical Garden
We're excited to transform our outdoor space into a lush oasis, and a vertical garden is the perfect way to do it. To get started, we need to choose the right plants that will thrive in a vertical setting, considering factors like sunlight, watering needs, and space constraints. Next, we'll focus on building a sturdy garden frame that will support our chosen plants and add visual appeal to our outdoor space.
Choosing the Right Plants
In creating a vertical garden, selecting the appropriate plants is crucial for its success. We need to carefully contemplate the plant arrangement, as it will determine the overall aesthetic and functionality of our garden. We recommend choosing plants with varied textures, colors, and growth habits to generate visual interest and depth. For example, we can mix flowering plants like petunias and geraniums with foliage plants like ferns and ivy.
When it comes to soil selection, we should opt for a well-draining potting mix that is specially formulated for vertical gardens. This kind of mix will help prevent waterlogged soil and root rot. We also need to take into account the seasonal maintenance requirements of our plants. Some plants may need more frequent watering during hot summer months, whereas others may require protection from frost during winter.
To make sure our plants thrive, we should establish a regular watering schedule. We can set up a drip irrigation system or utilize a self-watering planter to make watering more convenient and efficient. By selecting the appropriate plants and providing them with the proper care, we can create a remarkable and sustainable vertical garden that enhances the beauty and functionality of our outdoor space.
Building the Garden Frame
Transform Your Outdoor Space With These DIY Projects
Building the Garden Frame
As we move on to creating the framework of our vertical garden, the first step is to decide on a suitable structure. We'll consider a freestanding trellis, which is perfect for raised beds in a vegetable garden or flower beds in a landscaping design.
| Structure Type | Materials Needed | Space Requirements |
|---|---|---|
| Freestanding Trellis | Wood or metal frame, screws, wire mesh | At least 3 feet wide and 6 feet tall |
| Wall-Mounted Frame | Wooden or metal brackets, screws, wire mesh | At least 2 feet wide and 4 feet tall |
| Tiered Garden | Wooden or metal frames, screws, wire mesh | At least 4 feet wide and 8 feet tall |
Next, we'll prepare the site by clearing any debris and leveling the ground. We'll then assemble the structure according to our design. For a freestanding trellis, we'll attach the wire mesh to the frame using screws or wire. With the framework in place, we can now start planting our chosen greenery.
Backyard Pathway Ideas
A well-designed backyard pathway can make all the difference in creating an inviting outdoor space. It connects different areas of your yard and adds visual interest and beauty to your garden. As we look for innovative ways to transform our outdoor spaces, a well-planned garden pathway is a great place to start.
We love the idea of creating a stone walkway that meanders through the garden, inviting you to slow down and take in the sights and sounds of nature. A stone walkway can be made from a variety of materials, including bluestone, flagstone, or fieldstone, each with its unique texture and color. To create a seamless shift between the pathway and the surrounding garden, we recommend using a combination of small stones and larger slabs.
For a more rustic look, consider using gravel or decomposed granite to create a winding garden pathway. This type of pathway is not only low maintenance but also allows for good drainage, making it perfect for areas with heavy rainfall. To add some visual interest to your pathway, consider incorporating stepping stones, solar-powered lights, or small plants and flowers. By incorporating these elements, we can create a unique and inviting backyard pathway that reflects our personal style and complements our outdoor space.
DIY Birdhouse Installation
We're excited to create a DIY birdhouse installation that will attract some amazing birds to our outdoor space. To get started, we need to choose the right wood that can withstand the elements, and pick a birdhouse design that considers the specific needs of the birds we want to attract. From there, we'll walk through a simple installation process that requires minimal tools and expertise.
Choosing the Right Wood
When selecting wood for our DIY birdhouse installation, it's important to think about the type of wood that'll withstand various outdoor conditions. We'll need to choose wood types that are durable enough to handle rain, snow, and scorching sun. Cedar, cypress, and redwood are excellent options, as they're naturally resistant to rot and insect damage. We can also consider pressure-treated pine or reclaimed wood, but these options require more maintenance.
To further protect our birdhouse, we'll need to consider staining options. A waterproof stain or sealant will help shield the wood from moisture, whereas a UV-resistant stain will prevent fading. We can choose from a range of colors and finishes to match our outdoor decor. Regular maintenance is also important to extend the life of our birdhouse. We'll need to inspect the wood regularly for signs of damage or wear and reapply stain or sealant as needed. By choosing the right wood and stain, we can create a birdhouse that's both functional and visually appealing. This attention to detail will guarantee our DIY project stands the test of time.
Birdhouse Design Considerations
Creating a birdhouse that's functional and appealing requires careful consideration of a few key aspects. We want to craft a space that's inviting to birds, whilst adding a touch of character to our outdoor area. Regarding birdhouse design pointers, we've discovered that it's all about finding the right balance between form and function.
- We adore the concept of integrating unique birdhouse painting suggestions, such as using vibrant colors or playful designs, to inject some visual appeal into our birdhouse.
- A birdhouse placement guide is also crucial, as it will aid us in selecting the ideal location for our birdhouse – preferably, a spot that's shielded from severe weather and predators.
- Birdhouse maintenance suggestions are also vital to bear in mind, as we'll need to guarantee that our birdhouse stays tidy and clear of debris to uphold the well-being of our feathered companions.
- Taking into account the type of bird we wish to attract is also fundamental, as various species have distinct requirements and preferences in relation to nesting boxes.
Simple Installation Process
Installing our DIY birdhouse is a simple process that requires minimal tools and expertise. We'll guide you through it, ensuring you can confidently add this budget-friendly improvement to your outdoor area. Begin by selecting a location with the appropriate amount of sunlight and protection from strong winds. Make certain the area is level and free of debris.
Next, fasten the birdhouse to a tree or a pole using weather-resistant materials like galvanized screws or nails. This will guarantee the birdhouse remains secure and can endure various weather conditions. If you're attaching it to a tree, consider using a tree hanger or a mounting bracket to avoid harming the tree's bark.
To keep maintenance to a minimum, utilize easy maintenance solutions like a removable roof or a cleaning door. This will allow you to clean and inspect the birdhouse without having to dismantle it. By integrating these simple installation steps into your imaginative landscaping ideas, you can create a welcoming habitat for birds and enrich your outdoor area.
Outdoor Seating Area
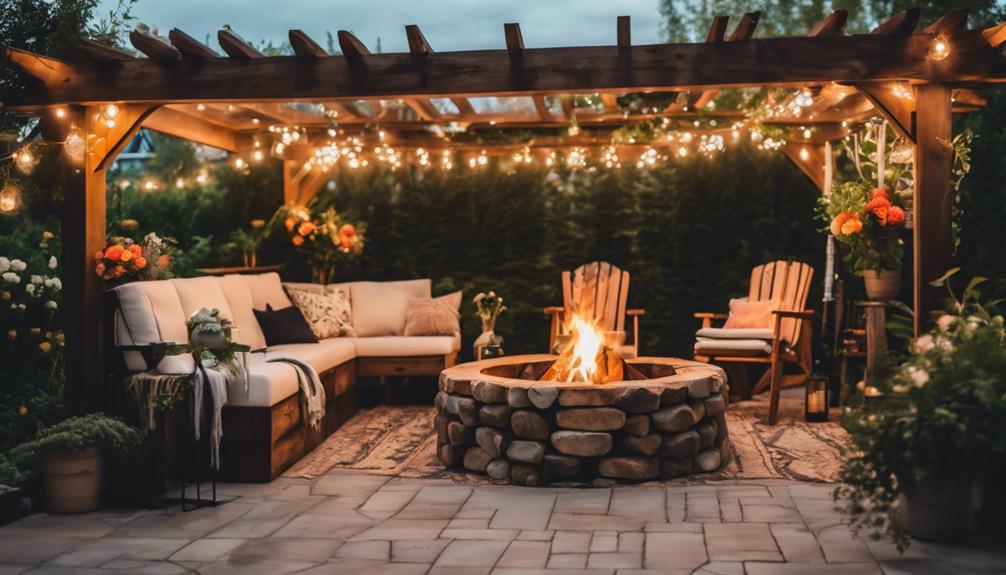
We're enhancing our outdoor space by creating a cozy seating area that's perfect for relaxation and socializing. An outdoor lounge is a vital element for any outdoor space, providing a comfortable spot to unwind and connect with loved ones. By incorporating a few innovative elements, you can transform your outdoor seating area into a cozy retreat.
When designing your outdoor seating area, consider the following elements to create a unique and inviting space:
- Focal Points: Incorporate statement pieces, such as a fire pit or a stunning piece of outdoor art, to draw the eye and create visual interest.
- Layered Lighting: Combine string lights, lanterns, and tabletop torches to create a warm and inviting ambiance.
- Textured Accents: Add throw pillows, blankets, and rugs in a variety of textures to create a cozy and inviting atmosphere.
- Nature-Inspired Elements: Incorporate natural elements, such as reclaimed wood, stone, or plants, to bring the outdoors in and create a seamless shift between indoors and out.
DIY Pergola Installation
Adding a pergola to our outdoor seating area can be a game-changer, providing shade, defining the space, and adding a touch of elegance. A well-designed pergola can transform a bland area into a stunning oasis. In terms of DIY pergola installation, it's vital to start with the basics. We need to contemplate the pergola construction fundamentals, including the type of materials to use, the size and shape of the structure, and the style that suits our outdoor space.
Pergola design ideas are limitless, but it's important to choose a style that complements our outdoor seating area. We can choose a classic, traditional design or a modern, sleek look. We can also incorporate pergola shade options, such as fabric, metal, or wooden louvers, to filter the sunlight and create a cozy atmosphere.
Once we've built our pergola, it's crucial to maintain it properly. Pergola maintenance tips include regular cleaning, inspecting the structure for damage, and applying a protective sealant to the wood or metal. By adhering to these suggestions, we can guarantee our pergola remains sturdy and beautiful for years to come. With a little creativity and some basic DIY skills, we can craft a stunning pergola that enriches our outdoor seating area and provides a perfect spot to relax and unwind.
Outdoor Dining Area
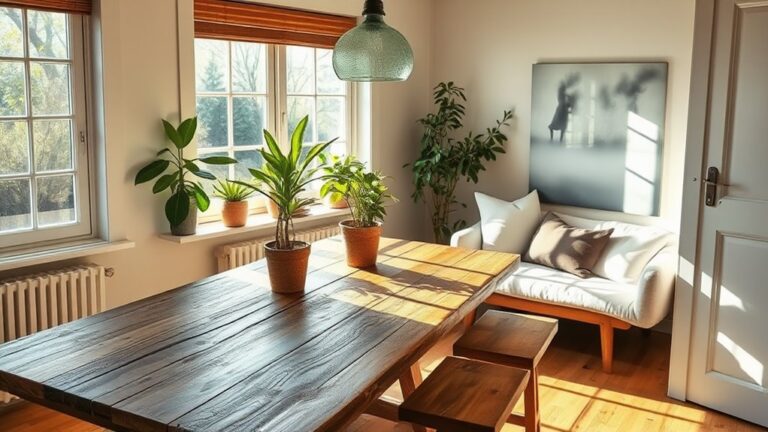
Our open-air dining space acts as the core of our alfresco adventure, uniting family and friends over delightful meals. It's where we craft memories and exchange laughter, and we aim for it to be as welcoming and cozy as possible. To accomplish this, we concentrate on choosing the appropriate patio furniture that complements our outdoor style. We select durable, weather-resistant pieces that can endure the elements, and we remember to include plush cushions and soft throw pillows to make the area truly inviting.
To further enrich the atmosphere, we integrate outdoor rug concepts that harmonize with our furniture and overall aesthetic. A lively outdoor rug can instantly uplift the space and generate a feeling of warmth and comfort. We also make certain to offer ample shade with a fashionable outdoor umbrella, ideal for those sunny afternoons.
Some crucial elements to ponder when designing an outdoor dining area include:
- *An eye-catching light fixture* to establish the mood for the space and generate a cozy ambiance
- *Luxuriant greenery* to introduce a natural aspect and foster a sense of tranquility
- *Soft textiles* to introduce warmth and dimension to the area
- *A practical layout* to ensure the space is comfortable and easy to navigate
DIY Outdoor Decorations
Transform Your Outdoor Space With These DIY Projects
DIY Outdoor Decorations
With a beautifully designed outdoor dining space in place, it's time to think about the decorative touches that will truly make it shine. We're excited to explore the endless possibilities of DIY outdoor decorations that can enhance your outdoor space.
| Project | Description | Difficulty Level |
|---|---|---|
| Outdoor Wall Art | Create a statement piece using reclaimed wood, metal, or recycled materials. Add a personal touch with customized designs or patterns. | Easy – Medium |
| DIY Garden Decor | Transform your garden into a whimsical oasis with handmade planters, birdhouses, or sculptures. Use natural materials like stone, wood, or bamboo. | Medium – Hard |
| Creating Outdoor Sculptures | Bring your outdoor space to life with 3D sculptures made from metal, wire, or recycled materials. Add a touch of elegance with solar-powered lights. | Hard |
To get started, consider creating outdoor wall art using reclaimed wood or metal. You can add a personalized touch with customized designs or patterns. Instead, try your hand at DIY garden decor, transforming your garden into a whimsical oasis with handmade planters, birdhouses, or sculptures. If you’re feeling ambitious, try creating outdoor sculptures using metal, wire, or recycled materials. With a little creativity, you can turn your outdoor space into a unique and inviting oasis that reflects your personal style. Incorporating colorful outdoor rugs, string lights, or cozy seating areas can further enhance the ambiance of your space. If you’re wondering how to design your backyard, consider blending different textures, plants, and decorative elements to create a harmonious and inviting environment. With thoughtful planning and a touch of creativity, your backyard can become a perfect retreat for relaxation and entertainment.
Repurposing Old Furniture
Repurposing old furniture breathes new life into discarded pieces, giving us a chance to get creative and upcycle our way to a one-of-a-kind outdoor space. As we transform our outdoor areas, repurposing furniture can add unique character to our DIY projects.
We love the idea of giving new life to old furniture, and with a little creativity, the possibilities are endless. For instance, an old door can become a one-of-a-kind outdoor bar, complete with a built-in counter and storage for our favorite drinks and snacks. We can furthermore repurpose old pallets to create a garden sculpture that adds visual interest to our outdoor space.
Some of our favorite repurposed furniture projects include:
- *Upcycled planters made from old boots and tubs, perfect for adding a pop of color and greenery to our outdoor space*
- *Vintage windows turned into beautiful mirrors, adding a touch of elegance to our outdoor decor*
- *Old ladders repurposed as outdoor shelves, ideal for displaying our favorite plants and decorative items*
- *Discarded pallets transformed into unique outdoor seating areas, ideal for cozying up with a good book or enjoying a glass of wine*
Frequently Asked Questions
How Do I Protect My Outdoor Furniture From Extreme Weather?
Picture coming home to find your beloved outdoor sofa ruined by a recent storm. We've all been there. To safeguard our outdoor furniture from harsh weather, we rely on waterproof covers and sealants. They're a game-changer. We additionally explore shelter options like gazebos or pergolas, and invest in storage solutions like outdoor cabinets to keep our furniture dry. By taking these steps, we can relish our outdoor spaces, regardless of the weather.
What Is the Importance of Drainage in Outdoor DIY Projects?
We can't stress enough how essential drainage is in our outdoor DIY projects. When we don't prioritize drainage, water can accumulate, leading to damage and safety concerns. To avoid this, we guarantee proper grading around our outdoor features, such as patios and walkways. Additionally, we apply a waterproof sealant to shield surfaces from water penetration. By taking these steps, we establish a functional and beautiful outdoor area that can endure the elements.
Can I Use Reclaimed Wood for All DIY Outdoor Projects?
We love incorporating reclaimed wood into our DIY projects, but we've learned it's not suitable for all outdoor projects. In addition to adding character, reclaimed wood can be prone to rot and decay when exposed to harsh weather. We recommend using reclaimed wood alternatives, like composite materials or durable hardwoods, for projects that require durability, such as outdoor furniture. Regular outdoor furniture care further helps extend the life of your reclaimed wood pieces.
How Do I Keep Pests Away From My Outdoor Plants?
We're always on the lookout for ways to keep pests at bay regarding our outdoor plants. One approach we swear by is using natural deterrents like neem oil and garlic spray to repel unwanted critters. By incorporating these into our plant care routine, we're preventing pest problems while promoting healthy growth. It's all about finding that perfect balance for pest prevention and a thriving garden.
Are DIY Outdoor Projects Suitable for All Skill Levels?
Just like building a house of cards, we start with a simple foundation and add complexity. In terms of DIY outdoor projects, we've found that they're suitable for all skill levels. Beginner-friendly projects like birdhouses and planters are perfect for those just starting out, whereas more advanced techniques like outdoor lighting and water features are ideal for seasoned DIYers looking to take their outdoor space to the next level.